Required Software
These lessons require the installation of R and RStudio (optionally BASH). The R open-source software is an object-oriented programming language for statistical computing and graphics. It compiles and runs on a wide variety of UNIX platforms, Windows, and MacOS.
RStudio is a set of integrated tools designed to help you be more productive with R. It includes a console, syntax- highlighting editor that supports direct code execution, and a variety of robust tools for plotting, viewing history, debugging, and managing your workspace.
The command line terminal available to Mac OS and Linux is a powerful tool and where the magic happens. It’s excellent for software development, file management, remote analysis, and a myriad of other tasks.
Mac OS Tips
- To download R, visit https://cran.r-project.org/ and at the top of the page, select the macOS operating system.
- Select the “Download R for macOS” link on the main page.
- Select the “base” link in the Subdirectories.
- Select the “R-4.1.2.pkg” link, and the R installer will begin to download.
- Open the installer and follow the instructions.
- To download RStudio, visit https://www.rstudio.com/products/rstudio/download/#download and follow the instructions to:
- “1. Install R”, which you have already done.
- “2. Download RStudio Desktop”
- Select the “Download RStudio for Mac” button and the R Studio installer will begin to download.
- Open the installer and follow the installation instructions.
Windows Tips
- To download R, visit https://cran.r-project.org/ and at the top of the page, select the Windows operating system.
- Select the “Download R for Windows” link on the main page.
- Select the “base” link in the Subdirectories.
- Select the “Download R 4.1.2 for Windows” link, and the R installer will begin to download.
- Open the installer and follow the instructions.
- To download RStudio, visit https://www.rstudio.com/products/rstudio/download/#download and follow the instructions to:
- “1. Install R”, which you have already done.
- “2. Download RStudio Desktop”
- Select the “Download RStudio for Windows” button and the R Studio installer will begin to download.
- Open the installer and follow the installation instructions.
- Optional - The Ubuntu terminal for Windows has many of the same features you’ll find using the terminal on Ubuntu for Linux, visit https://ubuntu.com/tutorials/ubuntu-on-windows#1-overview. Note that you will need a x86 PC running Windows 10.
- As a first step the Windows Subsystem for Linux needs to be installed for your version of Windows 10.
- For Windows 10 systems updated to the Windows 10 Fall Creators update released October 2017, run the following in PowerShell as Administrator:
dism.exe /online /enable-feature /featurename:Microsoft-Windows-Subsystem-Linux /all /norestart - For Windows 10 systems updated to the Windows 10 May 2020 update and newer run the following in PowerShell as Administrator:
dism.exe /online /enable-feature /featurename:VirtualMachinePlatform /all /norestart - Then restart your computer.
- Now Ubuntu can be installed from the Microsoft Store:
- Use the Start menu to launch the Microsoft Store application.
- Search for Ubuntu and select the first result, “Ubuntu”, published by Canonical Group Limited.
- Click on the Install button. Ubuntu will be downloaded and installed automatically. Progress will be reported within the Microsoft Store application.
- Ubuntu can now be launched in the same way as any other Windows 10 application, such as searching for and selecting Ubuntu in the Start menu.
Note: When launched for the first time, Ubuntu will inform you that it’s “Installing” and you’ll need to wait a few moments. Then enter a username and password specific to your Ubuntu installation, which don’t need to be the same as your Windows 10 credentials. With this step complete, you’ll find yourself at the Ubuntu bash command line.
R Package - edgeR
The edgeR R package allows you to perform differential expression biostatistical analysis using omics data.
The BiocManager makes it easy to install Bioconductor packages, including the Rsubread and edgeR packages in R. The following R code can be used to install these packages, for example.
Note that the first step in installing any Bioconductor package is to make sure that you have the BiocManager installed using the R programming language.
if (!require("BiocManager", quietly = TRUE))
  install.packages("BiocManager")

BiocManager::install("edgeR")
Software for Bioinformatics Lessons
SRA Toolkit
In the supplemental lessons of this workshop we will collect the transcriptomic data we need from the sequence read archive (SRA). Specifically, the transcript sequence data for the paper investigating the effects of UV-B exposure on the larvae of the red flour beetle.
To download the SRA toolkit:
- navigate to the installation instructions
- find the appropriate instructions for your operating system (OS)
Mac OS Tips
Steps 1 & 2
If you recieve an error when trying to use the tar command to unpack the downloaded software, try adding the -L flag like so to the following curl command.
curl -L --output sratoolkit.tar.gz http://ftp-trace.ncbi.nlm.nih.gov/sra/sdk/current/sratoolkit.current-mac64.tar.gzNow you should be able to use the following tar command without error:
tar -vxzf sratoolkit.tar.gz
Steps 3 & 4
If you do not recieve the expected similar output of “/Users/JoeUser/sratoolkit.2.4.0-1.mac64/bin/fastq-dump” from the which fastq-dump command, make sure that you use ls to check the name of the file unpacked by the previous tar command. For example:
lsThis shows us the files in our current directory, including the following just unpacked file:
sratoolkit.2.11.2-mac64So, this means we need to modify the command in the installation instructions as follows:
export PATH=$PATH:$PWD/sratoolkit.2.11.2-mac64/binNow, when we run the following which command we see the desired similar output:
which fastq-dump/YOUR/PATH/sratoolkit.2.11.2-mac64/bin/fastq-dump
Step 5
Make sure to run the following configuration command and navigate through the configuration interface by proceeding through the instructions.
vdb-config -iThis should bring up the following menu:
Where you should make sure to:
- enable (mark with X) the “Remote Access” option on the Main screen
- move to the “Cache” tab by clicking the tab and and pressing enter
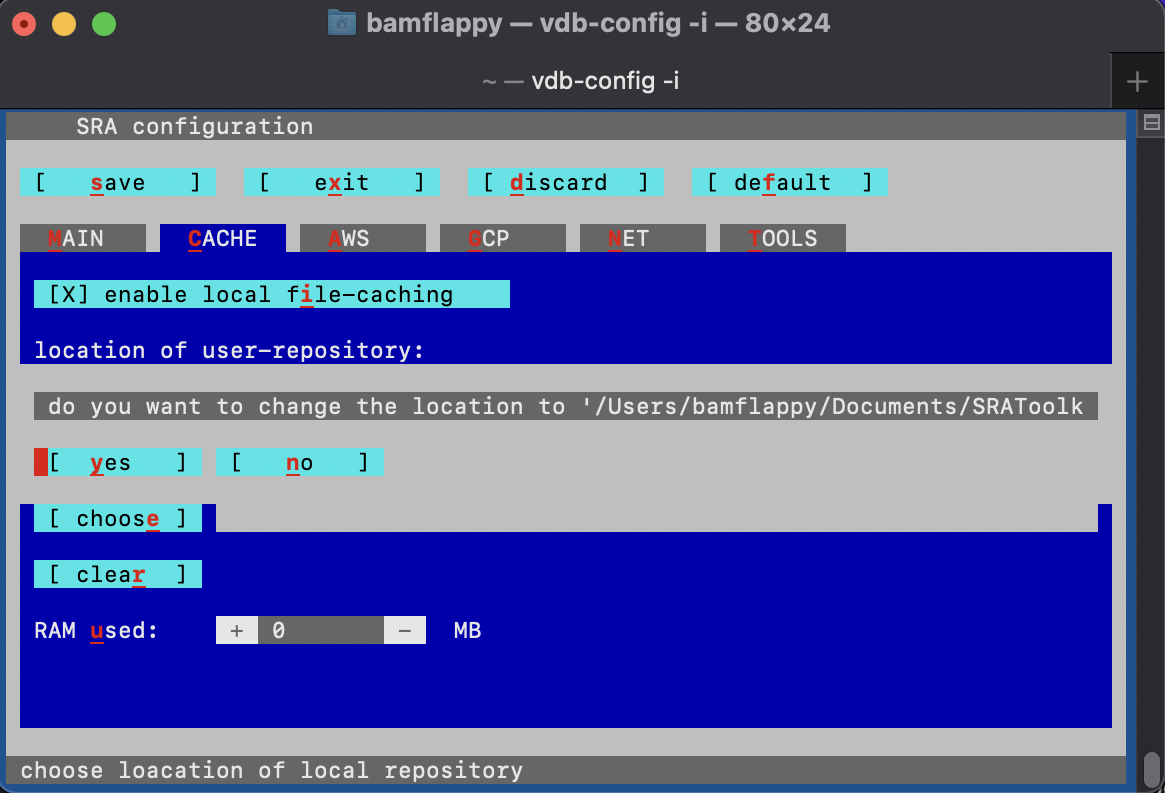
- enable “local file-caching”
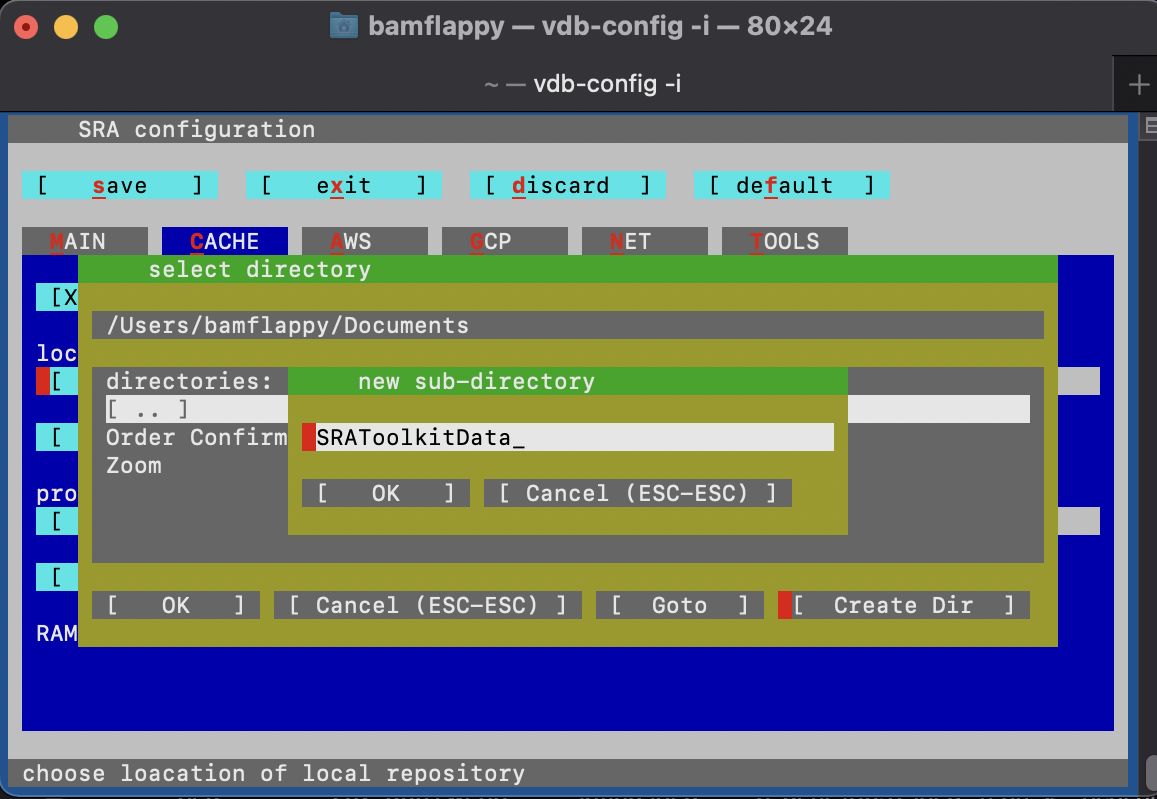
- set the “Location of user-repository” to an empty folder, which may be a new subdirectory that you can create using the configuration menu:
- confirm the selected the direcory
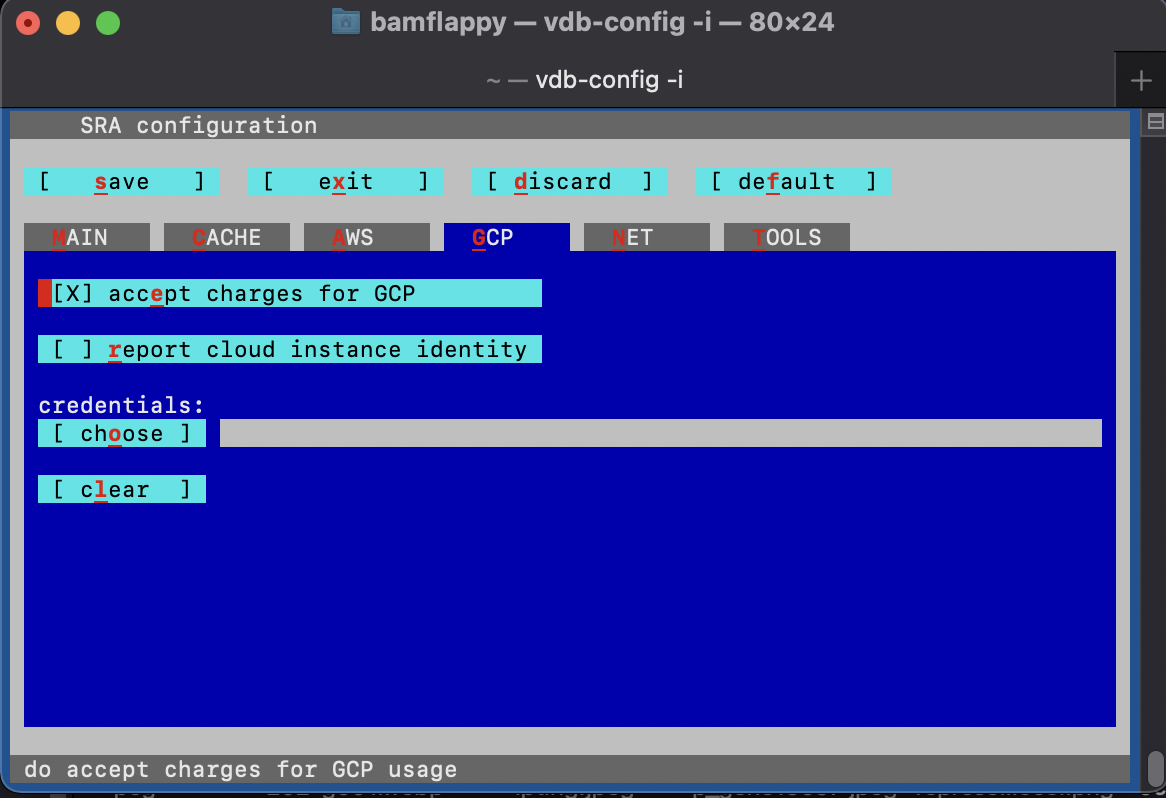
- go to the “CP” (cloud provider) tab and accept to “report cloud instance identity”
- save your changes to the configuration of the SRA Toolkit software
- you may now exit the configuration menu

Step 6
Now you should be able to run the following command without error:
fastq-dump --stdout SRR390728 | head -n 8And recieve the following output:
@SRR390728.1 1 length=72
CATTCTTCACGTAGTTCTCGAGCCTTGGTTTTCAGCGATGGAGAATGACTTTGACAAGCTGAGAGAAGNTNC
+SRR390728.1 1 length=72
;;;;;;;;;;;;;;;;;;;;;;;;;;;9;;665142;;;;;;;;;;;;;;;;;;;;;;;;;;;;;96&&&&(
@SRR390728.2 2 length=72
AAGTAGGTCTCGTCTGTGTTTTCTACGAGCTTGTGTTCCAGCTGACCCACTCCCTGGGTGGGGGGACTGGGT
+SRR390728.2 2 length=72
;;;;;;;;;;;;;;;;;4;;;;3;393.1+4&&5&&;;;;;;;;;;;;;;;;;;;;;<9;<;;;;;464262
fastq-dump was killed (signal 13 SIGPIPE)
FastQC
We will be using the FastQC bioinformatics software tool to check if the quality of the transcriptomic data that we will be using in this workshop.
To install the FastQC software application, or for the command line, follow the directions in their installation instructions document. Some important notes from their documentation follows.
Software Application Installation - OSX
FastQC is distributed as a DMG image file.
- Download the image from the project page and double click it to open it.
- You should see the FastQC application appear in a Finder window.
- Drag the application from there to wherever you want to install it on your machine.
- Once you’ve copied the application double click it to open it.
Important!
FastQC is not a signed application therefore it may initially be blocked by the Gatekeeper application on the Mac OS.
- To avoid this open FastQC by right clicking on the app and selecting open.
- This may prompt you to allow it to open.
- If it is still blocked go to System Preferences > Security and Privacy and you should see an option to allow the application to open.
- You only need to do this once and the preference should be remembered by OSX.
Tip!
A simple way to install the FastQC command line tool is using the following brew command in the terminal:
brew install fastqc
Software Application Installation - Windows & Linux
FastQC is a java application. In order to run it needs your system to have a suitable Java Runtime Environment (JRE) installed. Before you try to run FastQC you should therefore ensure that you have a suitable JRE.
- There are a number of different JREs available however the ones we have tested are the latest Oracle runtime environments and those from the adoptOpenJDK project (https://adoptopenjdk.net/).
- You need to download and install a suitable 64-bit JRE and make sure that the java application is in your path (most installers will take care of this for you).
Important!
On linux most distributions will have java installed already so you might not need to do anything. If java isn’t installed then you can add it by doing:
- Ubuntu / Mint:
sudo apt install default-jre
- CentOS / Redhat:
sudo yum install java-1.8.0-openjdk
Command Line Tool Installation
To run FastQC non-interactively you should use the fastqc wrapper script to launch the program. You will probably want to use the zipped install file on every platform (even OSX).
gffread
There are a few different ways that you could use to install the gffread software tool.
- The primary source is from the official website, which includes the software packages for download at the bottom of the page in the “Obtaining gffcompare” section.
- Another place that you can download the software packages for gffread is through the Anaconda website, or using the conda command line tool.
- It is also possible to build the program from the source packages available through their GitHub repository, and following their instructions in the “Installation” section of the README document.
Tip!
On the Mac OS is is possible to use conda to install the gffread command line tool.
Note: this does require a few extra steps for Z shel (zsh) users, which includes Mac user of the recent Catalina OS version.
wget https://repo.anaconda.com/miniconda/Miniconda3-latest-MacOSX-x86_64.sh -O ~/miniconda.sh

bash Miniconda3-latest-MacOSX-x86_64.sh -b -p $HOME/miniconda

source /YOUR/PATH/miniconda/bin/activate

conda init zsh

conda list

conda install -c bioconda gffread
Hisat2
We will be using the Hisat2 bioinformatics software tools to prepare the transcriptomic sequence data files for statistical analysis by aligning the transcriptomic data to a reference genome.
To install Hisat2 follow the instructions on their manual page in the “Building from source” section. First, download the source package from the Download section on the right side.
- unzip the file
- change to the unzipped directory
- build the HISAT2 tools by running GNU make (usually with the command make, but sometimes with gmake) with no arguments. If building with MinGW, run make from the MSYS environment.
Tip!
In order to run Hisat2 using the command line, you will need to your new HISAT2 directory to your PATH environment variable. To do this, follow your operating system’s instructions for adding the directory to your PATH. For example, on Mac OS:
export PATH=$PATH:$PWD/hisat2-2.2.1
R Package - Rsubread
The Rsubread package allows you to generate metrics on transcriptomic data for downstream analysis. The featureCounts function of the Rsubread library allows us to count the number of transcripts that map to each genomic feature in the Tribolum castaneum reference genome.
The BiocManager makes it easy to install Bioconductor packages, including the Rsubread and edgeR packages in R. The following R code can be used to install these packages, for example.
Note that the first step in installing any Bioconductor package is to make sure that you have the BiocManager installed using the R programming language.
if (!require("BiocManager", quietly = TRUE))
  install.packages("BiocManager")

BiocManager::install("Rsubread")